Starting the game
Upon starting the game, the player will find Bob the Necromancer facing a building, such as a house. Clicking or tapping[1] the house will cause Bob to fire a magic bolt at the building, dealing damage to it. After dealing sufficient damage, the house will crumble, dropping skulls (the primary currency for this game) and possibly letting out one or several panicking villagers running around ablaze. Tapping/clicking those villagers will also yield skulls. Collecting skulls and using them to purchase monsters and upgrades will give Bob and the monsters higher damage in order to take on more difficult challenges.
Skulls
Main article: Skulls

Skull is an in-game currency that allows players to buy and upgrade monsters. Players receive them through destroying buildings and killing villagers, also players can buy them at the Diamond Deal store.
Diamonds
Main article: Diamonds

Diamonds is a secondary currency in the game. Players use diamonds on skipping progress and upgrading buildings in Hell, and to use them in Diamond Store. Players can purchase Diamonds for real money, but they also get dropped by killing villagers.
Critical damage
As the player progresses through the game, when the player taps/click it is noticeable that, sometimes, Bob's damage will pop up in a red, bigger font. This means Critical damage. Critical damage has a base chance of 1% and deals double tap/click damage. It is possible to increase the critical damage percentage, but only through particular monster's skills (namely The Big Plague's skill Small Pox and Swarm of Bats' NANANANANANA). There are few items that increase critical damage percentage.
Sleeping

Bob is asleep
If players do not deal tap damage for 30 seconds then Bob will start falling asleep because he is inactive. At the start of the game it has no effects on gameplay, but as player start to receive items such as Power Potion then the sleeping will grant an effect based on item's brief description.
Progression
Every building destroyed counts towards Difficulty progression. Each difficulty contains a gauntlet of 10 buildings (reduceable via items or deals). All the buildings in the same difficulty level have the same health point except for the last one, which has 4 times higher health than the rest. The last one also always lets out 5 screaming villagers (meaning more skulls). Every 5th level of difficulty, after the last building of that difficulty level, the player will face a boss, namely, the Blacksmith's Union. The boss has 5 times the base health point of that difficulty level.
Bosses
Main article: Bosses

They are a bunch of warriors engaging the player while a wizard floats above them in a bubble. The player has 30 seconds to defeat them. Items, such as the magic ring, can extend that time. If the player fails to defeat the boss in time, you are thrown back into the last stage of the last difficulty you faced. There is no punishment for not defeating the boss within the time limit. The Blacksmith's Union's wizard will sometimes carry another bubble linked to his' by a tether. That second bubble contains White Orbs.
Broken Orbs
Main article: Orbs

Defeating the wizard (boss) will burst the bubble, causing the Orbs to fall on the floor and break. These broken orbs will then be put into the player's inventory. In their broken state, orbs are useless, but upon either activating a time portal, or using the Diamond purchase skill Fast Time Travel, the broken Orbs will be repaired.
Map
Main article: Map

The game is divided by areas in a large map. Each area comprises a certain number of difficulties, ranging from 20 at the beginning of the first map up to 1000 at the end of the third map; the game has since been expanded to seven maps, commonly referred to as worlds. The ending difficulty of the seventh world map is 5000. Also added to the game is "nightmare" versions of each of the seven world maps where the difficulties are the original difficulty times 5 plus 4000. The map works like sort of a dungeon: By clearing an area, you unlock the areas adjacent to it, which might lead to treasures or harder areas. The goal of the game is to clear all areas of the map, then to progress on to the world map, and clear the subsequent kingdoms.
Treasure Items
Main article: Items


In game exist various items that you can receive through chest, crafting and Devil Deals. Beside White Orbs and Minions, Items play big roll in game progression.
Item Stacking
Items in this game, with a few notable exceptions, stack additively, not multiplicatively. And they not only stack additively within the same kind of item, but they stack additively across the entire Items category. So, following a simple reasoning, it is easy to observe that stacking several items has diminishing returns and why it is cumbersome to do so.
Say the player has the Zombie Horde minion doing 1000 damage and no items. The player collects a Rare Zombie Horde's Eye giving 50% bonus to the Zombie Horde's damage. The Zombie Horde will now do 1500 damage. After collecting a second Rare Zombie Horde's Eye, the Zombie Horde now has a 100% bonus to damage, effectively doubling the damage to 2000.
If the player gets two more Rare Zombie Horde's Eye (a total of 4), the Zombie Horde now has a 200% bonus to damage, so the effective damage is now 3000.
If the player now gets a Rare Power Potion giving 50% bonus to damage when Bob sleeps, the Zombie Horde now has a 250% bonus damage since different items stack additively, so the effective damage is now 3500.
Despite having the same value of bonus (50% damage), each new item has a lower actual effect :
- 1st item : effective damage 1500, so 50% improvement over base damage
- 2nd item : effective damage 2000, so 33.33% improvement over 1 item
- 3nd item : effective damage 2500, so 25% improvement over 2 items
- 4th item : effective damage 3000, so 20% improvement over 3 items
- 5th item : effective damage 3500, so 16.67% improvement over 4 items
- and so on
DPS

How DPS is working in ZombIdle
Explanation by Lachhh
Total DPS consists of a few factors which are multiplied together. Those factors are:
- Non-tap monsters' DPS (base)
- Monsters' passive abilities
- Monsters' active abilities
- White Orbs
- Black Orbs
- Items
- Hell
- Achievements
- Carl the Monolith
- Shards
- Deals
Non-tap monsters' DPS
- Damage: D1 x 1.035(L-1)
Where D1 is the damage of the monster on level 1, and L is the current level of the monster. This formula only calculates the damage you get from buying the next level of the monster.
If you want to get the total damage of the monster, you have to calculate the sum of all levels from 1 to L using a geometric series formula.
- Total damage: D1 x (1 - 1.035(L-1)) / (1 - 1.035) + D1
Monsters' passive abilities
- Ability #1 - Adds 25% minion's dps (substitute 1.25 into formula if bought, otherwise 1)
- Ability #2 - Adds 50% minion's dps (substitute 1.50 into formula if bought, otherwise 1)
- Ability #3 - Adds 2% minion's dps per minion's level (substitute 0.02 into formula if bought, otherwise 0)
- Giant Zombie's Dem Big Pockets ability adds 5% non-tap monsters' dps (susbtitute 1.05 into formula for any monster if bought, otherwise 1)
Monsters' active abilities
- Monster specific skill - two minions have specific for them skill which insceases only their dps.
- Spectral Reposession - Adds 400% Specter's dps (only applicable for Blue Specter, substitute 4 into formula if activated, otherwise 0)
- Pastafury - Adds 700% Squid's dps (only applicable for Flying Squid, substitute 7 into formula if activated, otherwise 0)
- King's Presence (The Tomb King) - Adds 100% dps to all non-tap monsters (substitute 1 into formula if activated, otherwise 0)
- Son of the Lich - Doubles skills' effect (substitute 2 into formula if activated, otherwise 1)
White Orbs


Main article: Orbs
Black Orbs


Main article: Orbs
Black Necklace
If player possesses ![]() Black Necklace, then the following formula gives the correct multiplier
Black Necklace, then the following formula gives the correct multiplier
otherwise the multiplier is equal 1
Carl's Toenails
If player possesses ![]() Carl's Toenails, then the following formula gives the correct multiplier
Carl's Toenails, then the following formula gives the correct multiplier
otherwise the multiplier is equal 1
Items
Main article: Items
Hell

Main article: Hell
There are many buildings in Hell which enhance Bob and his team in various ways. Armageddon Armory is the building which gives a constant boost to all monsters DPS depending on its level.
| Level | Cost | Effect | Multiplier increase* | Construction Time |
|---|---|---|---|---|
| 1 | 25 |
Add 100%to non-tap monsters | x2 | 30 minutes |
| 2 | 50 |
Add 500% to non-tap monsters | x3 | 4 hours |
| 3 | 100 |
Add 2,300% to non-tap monsters | x4 | 12 hours |
| 4 | 200 |
Add 12,000% to non-tap monsters | ~x5 | 1 day (24 hours) |
| 5 | 500 |
Add 60,000% to non-tap monsters | ~x5 | 2 days (48 hours) |
| 6 | 750 |
Add 450,000% to non-tap monsters | ~x7.5 | 3 days (72 hours) |
| 7 | 1000 |
Add 2,250,000% to non-tap monsters | ~x5 | 5 days (120 hours) |
| Total | 2625 |
Add 2,250,000% to non-tap monsters | x22,501 | 280 hours 30 minutes |
* relative to previous multiplier.
Achievements
Main article: Achievements
Carl the Monolith
Main article: Carl the Monolith
Carl the Monolith is the last and the most expensive creature from hell Bob can summon, however his presence is indipsensable. Each level of Carl multiplies DPS of each monster by 3, which means the overall DPS is multiplied by 3.
Shards
Shards are the most effective way to increase overall DPS. Currently there are 3 types of shards:
- Splinters - the smallest and the weakest but also the cheapest. Splinters multiply DPS (
 War Splinter) by 1.1
 - Shards - the more powerful version, can be made from 3 splinters of the same type. Shards multiply DPS ( War Shard) by 2
- Big Shards (Fat Shards) - most powerful but the most expensive as well. Currently there's no way to obtain them other than crafting. Big Shards multiply DPS ( Mayhem Shard) by 6
Shard conversion
By using Forge player can convert weaker shards to the stronger ones:
- 3 splinters to 1 shard results in ~x1.50262960 DPS increase.
- 2 shards to 1 big shard results in x1.5 DPS increase.
Deals


Main article: Deals
In Zombidle there are two special deals which boost total DPS:
- The Touch of Fire (Diamond Deal, costs 5 Diamonds) - DPS x4.5
- Devil Deal - DPS x2.
Both are limited to only 60 seconds. By upgrading Chaos Resort you can increase the multiplier of each deal.
Total damage calculation
 |
"No update on Friday?!"
This section or article contains outdated informations. Help the wiki by updating them! |
According to Lachhh, the following is the formula to calculate the monster's damage:
A x B x C x D x E x F
Where:
- A is base damage
- B is Passive Skill bonus modifier
- C is Active Skill bonus modifier
- D is Item bonus modifier
- E is Hell Building bonus modifier
- F is Orbs bonus modifier
Base damage refers to the raw damage of the monster following the aforementioned formula.
Passive Skills are the skills purchased with skulls that every monster have, some have 3 and an Active Skill, others have 4. But all monsters have at least 3 skills that modify their damage: one that increases their DPS by 25%, another one that increases their dps by 50% and a final one that increases their DPS by 1~2% for each level they have (also affects their growth).
Active skills are skills that, once activated, increases one/all monster's DPS. In example, Blue Spectre's Spectral Repossession. It increases Blue Spectre's DPS by 400%, which translates into five times it's current damage.
Items are the ones acquired by opening Red/Blue chests or purchasing with White Orbs. There are some which increases a specific monster's DPS, and there are others which increase all monsters overall damage.
Hell provides 2 buildings that directly affect DPS: Armageddon Armory (for non tap monsters) and Golden Shower of Deathness (for Bob specifically). So when taking damage calculation for non tap monsters, use the damage bonus from the Armory in E. When calculating Bob's damage, use GSoD's damage bonus.
Finally, Orbs grants damage bonus to ALL creatures (including Bob). Please refer to the page (link in Progression section) for further explanation.
If you want to calculate the total damage done, including the multipliers you can use the following formula for damage:
- Damage: D1 x ( 1,25x 1,5x1,02^L) x (C x D x F x E) x L/(L - 1)
Tap damage
- Bob's passive abilities
- Items
- Hell
- Critical hit
Skulls
- Black Orbs
- Monsters' passive abilities
- Monsters' active abilities
- Items
- Achievements
- Hell
- Shards
- Deals
Monsters' Skull Cost
- Skull cost: S1 x 1.05(L-1)
Where S1 is the skull cost of the monster at level 1, and L is the current level of the monster. This formula only calculates the skull cost for buying the next level of the monster. If you want to get the total costs you have to calculate the sum of this formula in the same way as with the damage formula.
Hell

Main article: Hell
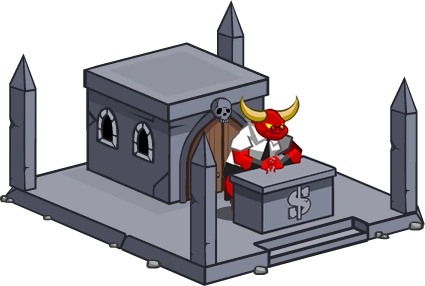
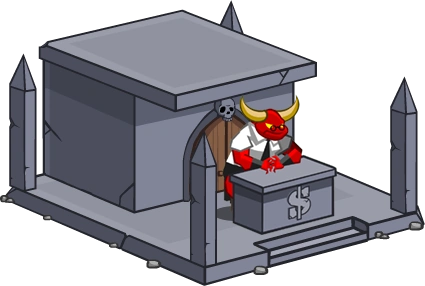
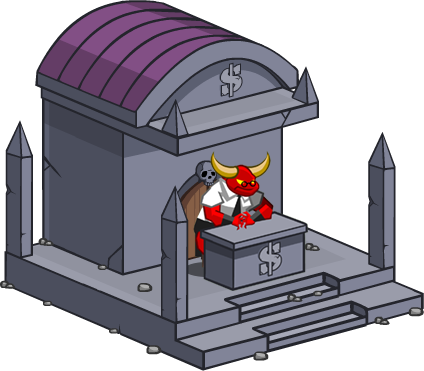
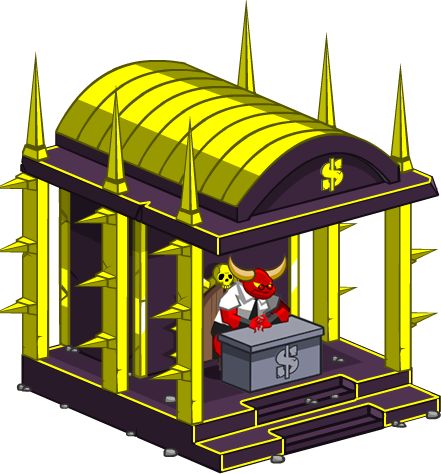
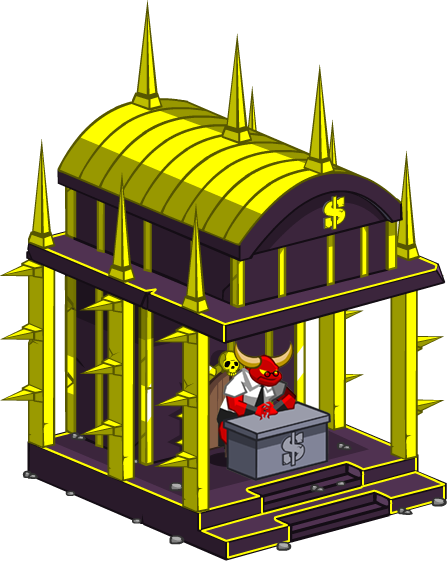
There are many buildings in Hell which enhance Bob and his team in various ways. Corporate Bank of Capitalism is the building which gives a constant boost to skull's value depending on its level.
| Level | Cost | Effect | Multiplier increase* | Construction Time |
|---|---|---|---|---|
 Level 1 |
40 |
Add 100% skull's value | x2 | 30 minutes |
 Level 2 |
75 |
Add 500% skull's value | x3 | 4 hours |
 Level 3 |
150 |
Add 2,300% skull's value | x4 | 12 hours |
 Level 4 |
300 |
Add 12,000% skull's value | ~x5 | 1 day (24 hours) |
 Level 5 |
750 |
Add 60,000% skull's value | ~x5 | 2 days (48 hours) |
 Level 6 |
1000 |
Add 450,000% skull's value | ~x7.5 | 3 days (72 hours) |
 Level 7 |
1000 |
Add 2,250,000% skull's value | ~x5 | 5 days (120 hours) |
 Level 8 |
1000 |
Add 11,250,000% skull's value | ~x5 | 5 days (120 hours) |
 Level 9 |
1000 |
Add 56,250,000% skull's value | ~x5 | 5 days (120 hours) |
| Total | 5315 |
Add 56,250,000% skull's value | x562,501 | 520 hours 30 minutes |
* relative to previous multiplier.
Shards
Shards are the most effective way to increase overall DPS. Currently there are 3 types of shards:
- Splinters - the smallest and the weakest but also the cheapest. Splinters multiply skull's value ( Greed Splinter) by 1.1
- Shards - the more powerful version, can be made from 3 splinters of the same type. Shards multiply skull's value ( Greed Shard) by 2
- Big Shards (Fat Shards) - most powerful but the most expensive as well. Currently there's no way to obtain them other than crafting. Big Shards multiply skull's value ( Fortune Shard) by 6
Shard conversion
By using Forge player can convert weaker shards to the stronger ones:
- 3 splinters to 1 shard results in ~x1.50262960 skull's value increase.
- 2 shards to 1 big shard results in x1.5 skull's value increase.
Deals
Main article: Deals
- Skullquistador (Diamond Deal, costs 5 Diamonds) - Skull's value x7.5 for 5 minutes
- Devil Deal - Skull's value x4 for 5 minutes
Tapping/Clicking vs Idling
Players often discuss which is the best way to deal more damage: madness clickfest or idle DPS. More experienced players suggest that idling is more efficient than tapping/clicking due to the following reasoning:
Monster damage growth is far superior than Bob's in terms of cost/benefit. In other words, Bob's upgrade price for each level grows exponentially costlier despite his mediocre damage increase per level, whereas monsters' DPS growth is consistent (do note the previous section's content, though). Also, there are two determining factors that allows monster's damage to outshine Bob's: Hell Buildings and Power Potion.
Armageddon Armory in Hell increases non-tap monsters damage by 100% on level 1. This effectively doubles monsters' DPS, whereas Golden Shower of Deathiness increases Bob's damage by 5% of total DPS.
Power Potion increases non-tap monsters damage by a certain percentage when Bob sleeps (the player goes AFK for a while). By gathering enough Power Potions, one can actually double non-tap monsters damage.
This makes Bob essentially useless after a few resets (in other words, gathering lots of White Orbs). You only need to pump Bob's damage for the Bob-only challenges, where he is the only source of damage for this area. Even taking this into account, all one has to do is build the first level of the Golden Shower of Deathness, and the player will easily clear a particular challenge, provided the monster's DPS is of a high enough level.
This is also untrue when using the Blackest of Plagues from the Big Plague along with Son of the Lich from the Black Lich, and modifiers from the Golden Shower of Deathness which allows Bob's tap damage to exceed the damage lost from Power Potions for the duration of the abilities.
The only way to do "Idle DPS" is by acquiring or crafting items with the "Add ___% to all DPS when Bob sleeps" effect, which are Power Potions, Ultima Potions and Elixirs of Madness. They stack additively with every other DPS increasing items.
- A single Power Potion is giving the same bonus as two Power Axes of the same rarity. Since 3 Axes are needed to craft a Power Potion, crafting a Power Potion is not recommended. Especially when you can use 2 Axes and an Ectoplasm Ball to have a Magic Axe, giving 300% bonus DPS to all monsters. 2 Magic Axes are also favorable to a single Ultima Potion when it comes to crafting, as 2 Magic Axes only take 4 Power Axes for 600% where A Ultima Potion takes 9 Power Axes for 500%.
- A single Power Potion is giving the same bonus to a single monster as a regular Monster Item of equal rarity. Limiting a Power Potion's priority over monster items either as a crafting material (for Piggy Banks of Doom or Pearl Necklaces for instance) or as a consistent DPS boost early on when the monster of choice for level and item upgrades hasn't been acquired yet. As for upgrading monster items through crafting, items from different monsters can be used to upgrade a specific one (For instance, Squid's Teddy Bear + Zombie Horde's Eye + either one of the previous two = improved King's Collar).
Apart from the obvious possibility to tap virtually endlessly with no penalty to DPS, another advantage tapping has over idling is the possibility to use the Sloth Form skill (10 tap per second) combined with Blackest of Plagues (50% to do crits, 2x damage by default) and Son of the Lich (2x skill effects, which makes 100% crit chance). Which makes a total of 40x regular tap damage. Since The Golden Shower of Deathliness adds 5% of total DPS to tap DMG, this allows us to get 5x40%=100% of the total DPS for the entire duration of Sloth Form for each time the Golden Shower is upgraded/purchased, all of which gains another 100% with the Power Necklace, since crit damages are doubled.
Dynamic Bosses
Dynamic bosses are special kind of bosses who cannot be killed but instead they increase their level by a value specific for them each time they are defeated. Although you are not able to kill them, you may only challenge them once per timeline. In order to fight them again, you have to use Time Portal and reset part of your progress.
Currently in game there is only one dynamic boss that is not bound to any event - The Angel. His level increases by 250 each time he is defeated. He drops special Divine items he is the only source of ![]() Orb Splinters.
Orb Splinters.
The other dynamic bosses exist in the game only for the time on an event. Usually their level increases by 10 and they drop event currency or some items.
Event mechanics
Events' types
In Zombidle there are two types of events:
- Special currency based events - in these events player is supposed to collect special currency by destroying houses in order to be able to purchase special new items.
- Challenges based events - in these events player must complete special challenges to collect special items.
Both types also often bring a special map in the theme of the event into the game.
Event currencies
Soft Cap

Since v1.03.047
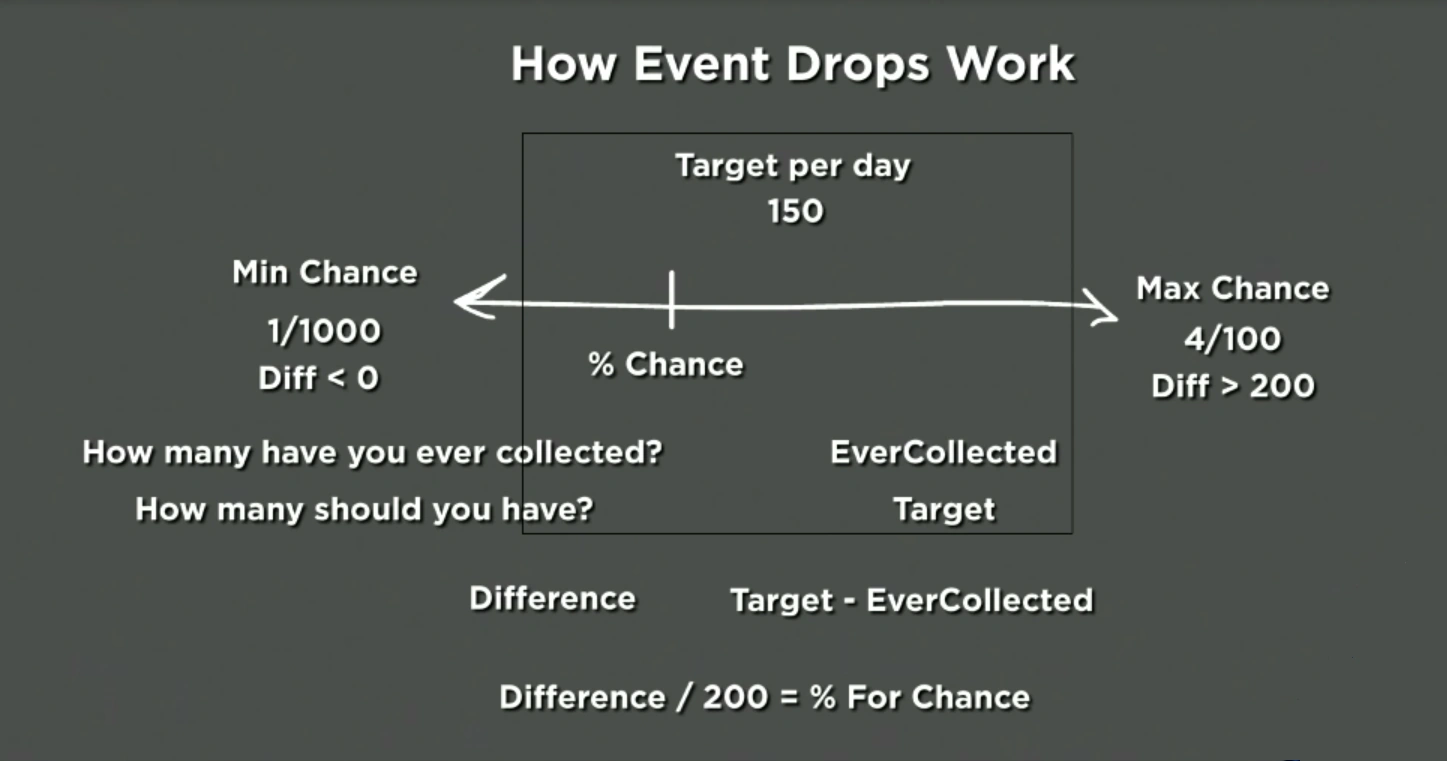
The soft cap increases by a constant value every 4 hours from a fixed time set by the developers. The game uses a difference to figure out your drop chance:
The chance is calculated using the following procedure:
- If the difference is greater than 200, your chance is 4%.
- If the difference is less than 0, your chance is equal 0.1%.
- Otherwise the drop chance is calculated using lerp (linear interpolation) function, which means that your chance decreases linearly as you get closer to the cap:
It's important to note that the soft cap doesn't block currency drops if you are beyond the cap, but your drop chance is 0.1%.
Hard Cap
Removed in v1.03.047
The hard cap increases by a constant value every 4 hours from a fixed time set by the developers. The game uses a difference to figure out your drop chance:
The chance is set to 2% if your difference is greater than 200, otherwise it is calculated using lerp (linear interpolation) function, which means that your chance decreases linearly to 0.1% as you get closer to the cap and immediately drops to 0% once you reach the cap.
Unlike the soft cap, the hard cap completely blocks currency drops once you hit the cap.
References
- ↑ Instead of clicking with the mouse, you can also mash the keyboard, just make sure the cursor is placed accordingly.